
Discover 30+ easy fine motor activities for preschool classroom use, plus no-prep ideas, pencil grip boosters, and a free observation checklist.
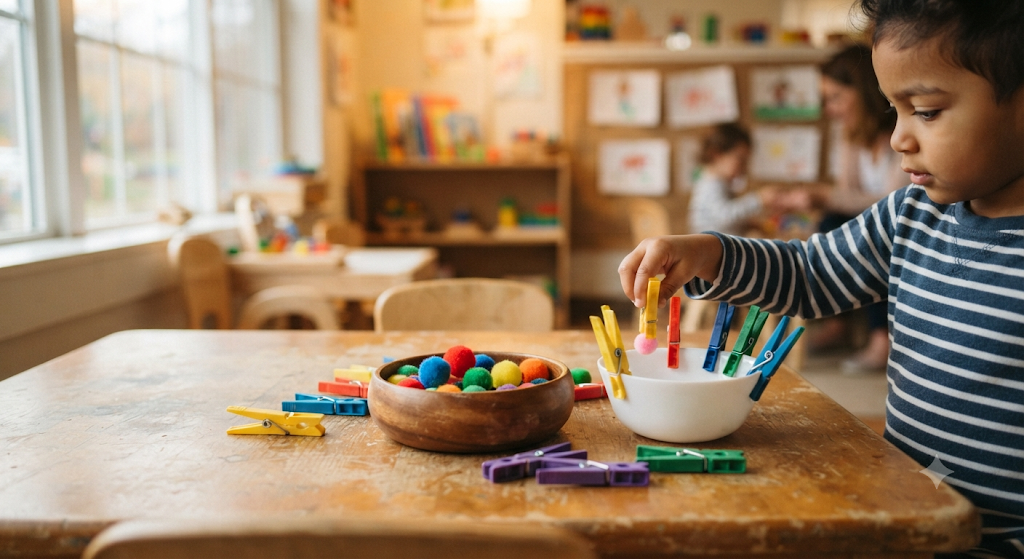
If you’ve ever watched a three-year-old wrestle with a zipper or a four-year-old grip a crayon like it’s a hammer, you already know how much little hands still have to learn. After fifteen years in early childhood classrooms, I can tell you that the single biggest game-changer for school readiness isn’t flashcards or worksheets it’s strong, capable hands. That’s exactly why easy fine motor activities for preschool classroom routines matter so much, and why I’ve built my daily schedule around them for over a decade.
Fine motor skills are the quiet engine behind almost everything we ask young children to do: holding a pencil, buttoning a coat, cutting on a line, scooping their own snack. When those small hand muscles are strong and coordinated, children walk into kindergarten with confidence instead of frustration. When they’re not, even eager learners can struggle to keep up.
This guide is the one I wish I’d had my first year teaching. It’s packed with 30 classroom-tested activities, no-prep options for those chaotic mornings, household-item ideas for families, and a printable observation checklist you can start using today. Everything here uses cheap, easy-to-find materials, and every activity has been tried, tweaked, and approved by real three, four, and five-year-olds.
Let’s dig in.
What Are Fine Motor Skills?
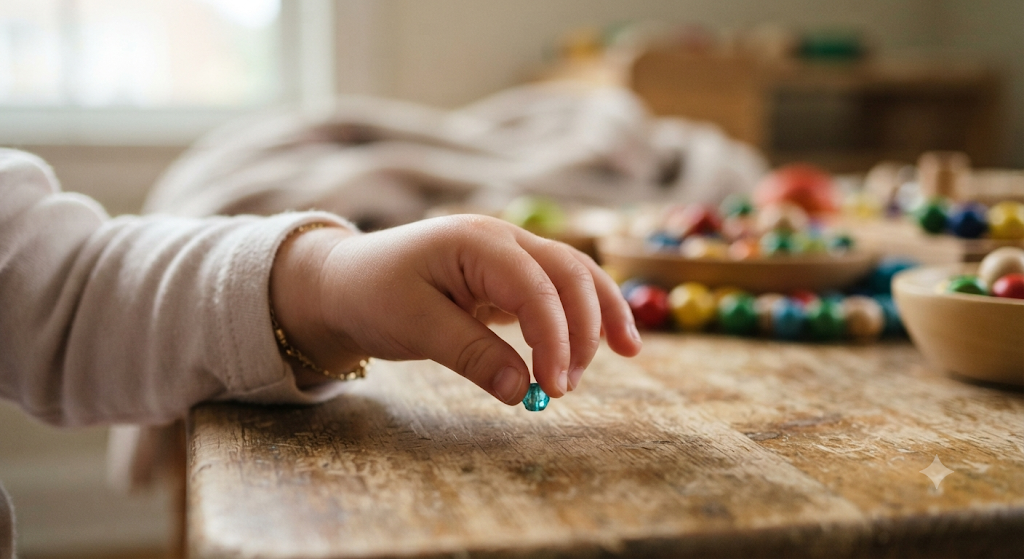
Fine motor skills are the small, precise movements made by the muscles in the hands, fingers, and wrists usually working together with the eyes in what’s called hand-eye coordination. They’re different from gross motor skills, which involve the big muscle groups used for running, jumping, and climbing.
In practical terms, fine motor skills show up in tasks like:
- Picking up a raisin with two fingers (the pincer grasp)
- Turning pages in a board book
- Snapping puzzle pieces into place
- Squeezing a glue bottle
- Buttoning, zipping, and snapping clothing
- Holding scissors and cutting along a line
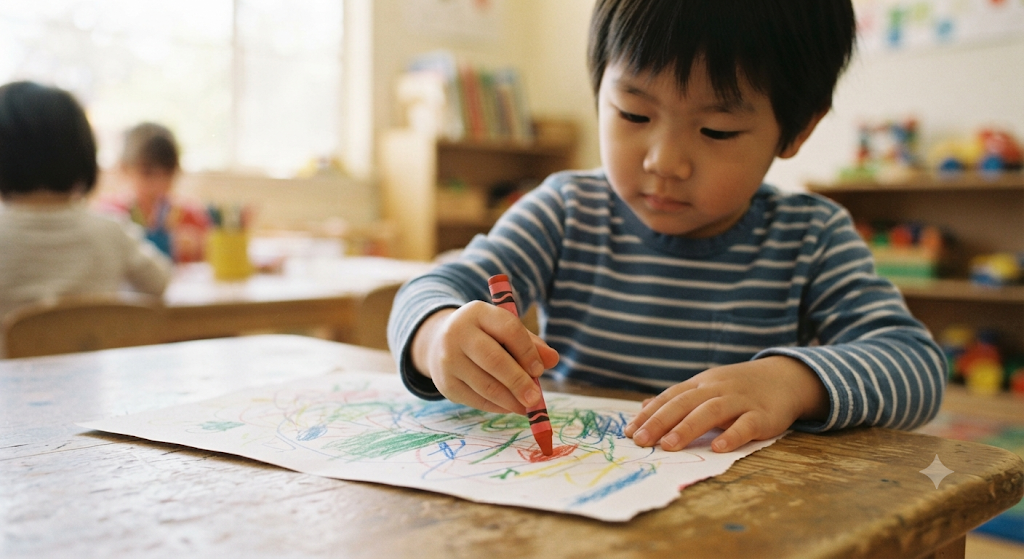
- Gripping a pencil, crayon, or marker to draw and write
The difference between fine and gross motor skills matters because both develop on separate (though related) timelines. A child can be an incredible climber and still need lots of practice with a pincer grasp and that’s completely normal. Fine motor development tends to lag slightly behind gross motor development in the preschool years, which is exactly why intentional practice matters so much in a preschool or kindergarten classroom.
Why Are Fine Motor Skills Important for Preschoolers?
Every preschool teacher has a moment where a parent asks, “Why are we doing playdough again? Shouldn’t we be learning letters?” Here’s my honest answer: the playdough is the letter lesson. Strong hands are the foundation everything else is built on.
Pencil control. Before a child can form a legible letter, their fingers need the strength and control to hold a writing tool steady and move it with purpose.
Hand strength. Activities like squeezing tweezers or rolling playdough build the intrinsic hand muscles children need for sustained writing tasks later on.
Independence. Fastening buttons, zipping coats, and opening snack containers all rely on fine motor skills — and mastering them builds real self-esteem.
Self-care skills. Brushing teeth, using utensils, and washing hands all depend on the same small muscle groups we’re strengthening during classroom activities.
Writing readiness. Children with strong fine motor foundations transition into writing tasks with far less frustration and far more stamina.
Confidence. A child who can competently manage tools and materials feels capable — and that confidence spills over into every other area of learning.
Brain development. Fine motor tasks activate significant areas of the brain related to coordination, focus, and language development, making these activities cognitively rich, not just physical.
Organizations like the https://www.aap.org and NAEYC both emphasize that hands-on, play-based learning including fine motor play is essential during the preschool years, not a “nice extra.” This is one of the most well-supported ideas in early childhood education, and it’s worth repeating to families and administrators alike.
How to Prepare Your Preschool Classroom for Fine Motor Learning
You don’t need a fancy budget to build an excellent fine motor program. You need thoughtful setup.
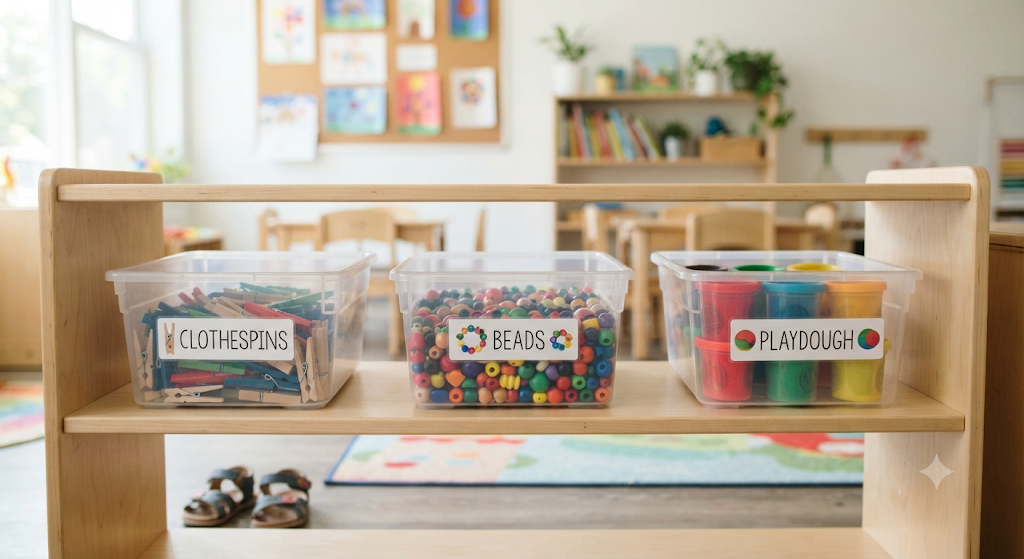
Classroom setup. Dedicate a low shelf or table specifically to fine motor materials so children can access it independently. Independent access is half the battle — children practice more when they don’t need permission to start.
Fine motor centers. Rotate 3–5 activities at a time in clearly labeled bins. A center-based approach (rather than “one activity for the whole class”) allows for differentiation, since children can choose or be guided toward the right challenge level.
Storage ideas. Clear shoebox-sized bins, muffin tins, and repurposed egg cartons are inexpensive, stackable, and easy for little hands to carry and return.
Low-cost materials. Clothespins, pom-poms, buttons, dry beans, popsicle sticks, and pipe cleaners cost very little and can be reused across dozens of activities.
Safety tips. Always supervise activities with small items (beads, buttons, dry beans) closely, especially with children who still mouth objects. Keep a clear “activities with small parts” sign so assistants and substitute teachers know which centers need closer supervision.
30 Easy Fine Motor Activities for Preschool Classroom
These are the activities I return to year after year. They’re organized loosely by material so you can build centers around what you already have on hand.
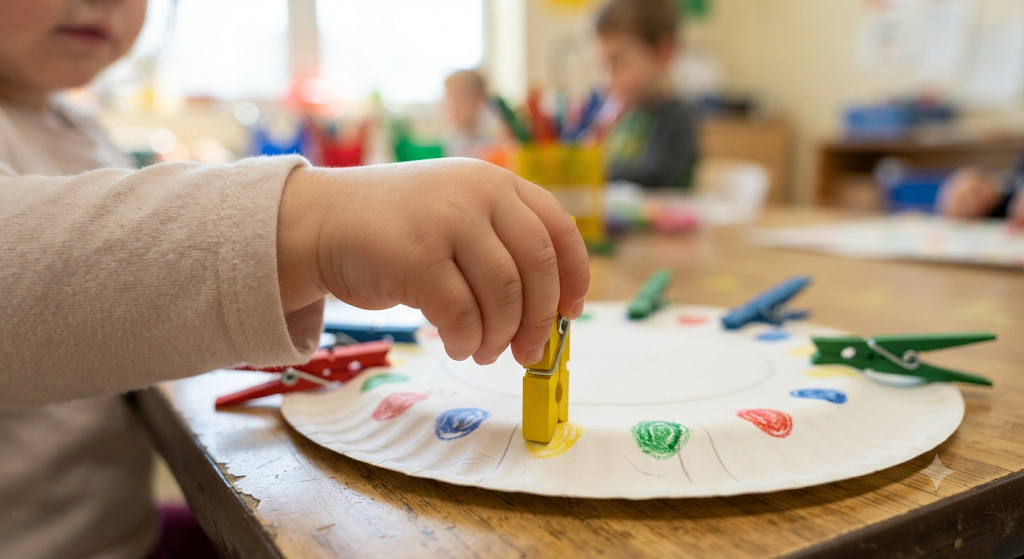
1. Clothespin Color Match
Learning Objective: Strengthen the pincer grasp while reinforcing color recognition.
Materials: Spring-style clothespins, colored paper circles or a paint chip strip.
Steps: 1) Tape colored circles around the rim of a bowl or paper plate. 2) Give children clothespins painted or marked to match each color. 3) Children squeeze open a clothespin and clip it to the matching color.
Teacher Tip: Warm up tight clothespins by loosening the spring slightly for younger squeezers.
Skills Developed: Pincer grasp, finger strength, color matching.
Age: 3–4 years.
Difficulty: Easy.
Common Mistake to Avoid: Using clothespins that are too stiff, which causes frustration rather than strength-building.
Home Variation: Clip clothespins around the edge of a cereal box.
Advanced Variation: Add number matching instead of color matching.
Extra Support Variation: Use looser, oversized plastic clothespins.
Estimated Time: 10 minutes.
2. Tweezer Pom-Pom Sort
Learning Objective: Build precision grip and hand-eye coordination.
Materials: Kid-safe tweezers, pom-poms in assorted colors, ice cube tray.
Steps: 1) Dump pom-poms into a central bowl. 2) Children use tweezers to pick up one pom-pom at a time. 3) Sort each pom-pom into the matching color section of the ice cube tray.
Teacher Tip: Start with jumbo pom-poms before moving to small ones.
Skills Developed: Pincer grasp, visual motor skills, sorting.
Age: 3–5 years.
Difficulty: Easy to moderate.
Common Mistake to Avoid: Introducing tiny pom-poms before children can manage tweezers with larger ones.
Home Variation: Use kitchen tongs and cotton balls at the dinner table.
Advanced Variation: Time the sort for an added challenge.
Extra Support Variation: Offer a spring-loaded “easy grip” tweezer.
Estimated Time: 10–15 minutes.
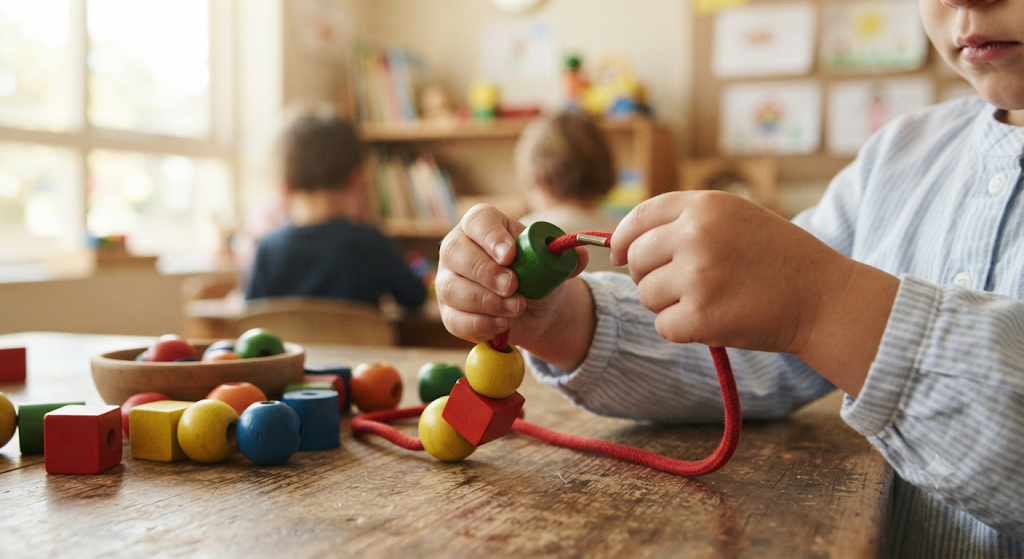
3. Bead Threading Necklace
Learning Objective: Develop bilateral coordination and hand-eye coordination.
Materials: Large wooden or plastic beads, shoelace or pipe cleaner.
Steps: 1) Knot one end of the lace. 2) Children thread beads onto the lace one at a time. 3) Tie off the necklace when finished. Teacher Tip: Dip the lace tip in glue and let it dry to create a stiff “needle” tip for easier threading.
Skills Developed: Bilateral coordination, threading, patience.
Age: 3–5 years.
Difficulty: Easy to moderate.
Common Mistake to Avoid: Using floppy string with no stiffened end, which makes threading nearly impossible for beginners. Home Variation: Thread dry pasta onto yarn.
Advanced Variation: Ask children to create a repeating color pattern.
Extra Support Variation: Use a pipe cleaner, which is rigid and threads far more easily.
Estimated Time: 15 minutes.
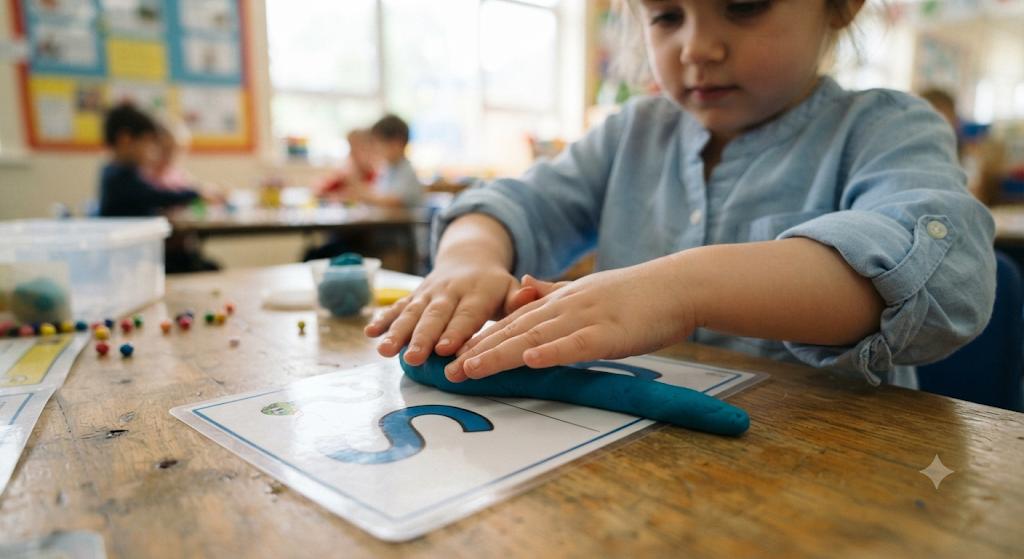
4. Playdough Alphabet Mats
Learning Objective: Strengthen hand muscles while introducing letter formation.
Materials: Playdough, laminated alphabet cards.
Steps: 1) Place a laminated letter card in front of the child. 2) Children roll playdough into “snakes.” 3) They shape the snake to form the letter over the printed model.
Teacher Tip: Let children roll and squish freely first — warmed-up hands work better.
Skills Developed: Finger strength, letter recognition, pre-writing.
Age: 3–5 years.
Difficulty: Moderate.
Common Mistake to Avoid: Skipping the free-play warm-up, which leads to weak, tired hands before the actual task.
Home Variation: Use homemade salt dough on a placemat with the child’s name letters.
Advanced Variation: Have children form their full first name.
Extra Support Variation: Provide a pre-formed playdough rope for the child to simply place onto the letter.
Estimated Time: 15–20 minutes.
5. Pipe Cleaner Bead Towers
Learning Objective: Build finger isolation and bilateral coordination.
Materials: Pipe cleaners, pony beads.
Steps: 1) Bend the bottom of a pipe cleaner into a small loop so beads won’t fall off. 2) Children thread beads upward. 3) Bend the top into a loop to finish.
Teacher Tip: Twist pipe cleaners into a spiral shape for children who need a slower, more controlled threading pace.
Skills Developed: Bilateral coordination, finger isolation, counting.
Age: 3–5 years.
Difficulty: Easy.
Common Mistake to Avoid: Choosing beads with holes too small for the pipe cleaner’s thickness.
Home Variation: Make “bracelets” sized to fit a stuffed animal’s wrist.
Advanced Variation: Count beads aloud or create an ABAB pattern.
Extra Support Variation: Pre-thread the first three beads to give momentum.
Estimated Time: 10 minutes.
6. Button Snake Lacing
Learning Objective: Improve grasp and two-handed coordination.
Materials: Large buttons, thick cord or ribbon.
Steps: 1) Knot one end of the cord. 2) Children lace buttons through the cord one at a time. 3) Continue until the “snake” is full. Teacher Tip: Use flat, large-holed buttons for easier lacing at the start of the year.
Skills Developed: Grasp development, bilateral coordination.
Age: 4–5 years.
Difficulty: Moderate.
Common Mistake to Avoid: Using buttons with holes too small for small fingers to manage alongside the cord.
Home Variation: Lace buttons onto a pipe cleaner to make a bookmark.
Advanced Variation: Require alternating button sizes or colors.
Extra Support Variation: Use a shoelace with a hard plastic tip and jumbo buttons.
Estimated Time: 10–15 minutes.
7. Popsicle Stick Puzzle Build
Learning Objective: Build visual motor skills and hand control.
Materials: Popsicle sticks, a printed picture cut into strips and glued onto sticks.
Steps: 1) Mix up the sticks. 2) Children line the sticks up side by side. 3) Rearrange until the picture reforms correctly.
Teacher Tip: Number the backs lightly in pencil for a self-checking option.
Skills Developed: Visual motor skills, hand control, sequencing.
Age: 4–5 years.
Difficulty: Moderate.
Common Mistake to Avoid: Choosing images that are too visually similar across sticks, making the puzzle frustrating rather than achievable.
Home Variation: Use a family photo cut into stick-sized strips.
Advanced Variation: Remove the numbered backs for a true test of visual discrimination.
Extra Support Variation: Keep the numbered guide visible throughout.
Estimated Time: 10 minutes.
8. Paper Tearing Collage
Learning Objective: Build the pincer grasp and bilateral hand use.
Materials: Scrap paper, construction paper, glue stick.
Steps: 1) Children tear scrap paper into small pieces using thumb and forefinger of both hands. 2) Glue torn pieces onto construction paper. 3) Arrange into a picture or free-form collage.
Teacher Tip: Model the “pinch and pull” motion slowly before children begin.
Skills Developed: Pincer grasp, bilateral coordination, creativity.
Age: 3–4 years.
Difficulty: Easy.
Common Mistake to Avoid: Using paper that’s too thick or glossy, which resists tearing and discourages young hands.
Home Variation: Tear old magazines for a collage of a favorite animal.
Advanced Variation: Ask children to tear paper into a specific shape, like a circle.
Extra Support Variation: Pre-score paper with light creases to guide tearing.
Estimated Time: 15 minutes.
9. Lacing Cards
Learning Objective: Strengthen hand-eye coordination and grasp.
Materials: Hole-punched cardstock shapes, plastic lacing needles or shoelaces.
Steps: 1) Give children a hole-punched card and lace. 2) Children thread the lace in and out of each hole around the shape. 3) Tie off when complete.
Teacher Tip: Laminate cards so they hold up to repeated use all year.
Skills Developed: Hand-eye coordination, sequencing, grasp.
Age: 3–5 years.
Difficulty: Moderate.
Common Mistake to Avoid: Spacing holes too close together, which makes lacing physically difficult for beginners.
Home Variation: Punch holes around a paper plate for an easy DIY card.
Advanced Variation: Introduce a whip-stitch pattern (over the edge rather than in-and-out).
Extra Support Variation: Use a stiffened lace tip and widely spaced holes.
Estimated Time: 10–15 minutes.
10. Pegboard Pattern Copy
Learning Objective: Build pincer grasp and visual motor planning.
Materials: Pegboard, colored pegs, pattern cards.
Steps: 1) Show a simple pattern card. 2) Children pick pegs and place them to match the pattern. 3) Check work against the card.
Teacher Tip: Start with a 3×3 grid before moving to larger boards.
Skills Developed: Pincer grasp, visual motor planning, pattern recognition.
Age: 4–5 years.
Difficulty: Moderate.
Common Mistake to Avoid: Introducing complex, multi-color patterns before children master simple ones.
Home Variation: Use a muffin tin and dried beans as a makeshift pegboard.
Advanced Variation: Have children design their own pattern for a partner to copy.
Extra Support Variation: Use large golf-tee-style pegs and a foam board.
Estimated Time: 10 minutes.
11. Sticker Dot Matching
Learning Objective: Build the pincer grasp through peeling motion.
Materials: Dot stickers, numbered or colored worksheet.
Steps: 1) Children peel one sticker at a time from the sheet. 2) Place it onto the matching number or color on the worksheet. 3) Continue until complete.
Teacher Tip: Pre-loosen sticker edges slightly for children with weaker pincer grasps at the start of the year.
Skills Developed: Pincer grasp, number and color recognition.
Age: 3–4 years.
Difficulty: Easy.
Common Mistake to Avoid: Using a full sheet of stickers stuck very tightly, which causes frustration before the learning even begins.
Home Variation: Use stickers to decorate a name card, placing one per letter.
Advanced Variation: Match stickers to written number words instead of numerals.
Extra Support Variation: Pre-peel stickers halfway so the child only needs to lift and place.
Estimated Time: 10 minutes.
12. Cotton Ball Transfer
Learning Objective: Build hand strength and grasp through squeezing.
Materials: Cotton balls, tongs or clothespin “tongs,” two bowls.
Steps: 1) Fill one bowl with cotton balls. 2) Children use tongs to grip and transfer cotton balls one at a time. 3) Continue until the first bowl is empty.
Teacher Tip: Add a race-the-timer element for older, more competitive groups.
Skills Developed: Hand strength, grasp, focus.
Age: 3–4 years.
Difficulty: Easy.
Common Mistake to Avoid: Using tongs that are too stiff for small hands to open.
Home Variation: Use a spare pair of kitchen tongs and marshmallows.
Advanced Variation: Add color sorting into multiple bowls.
Extra Support Variation: Allow direct hand-to-hand transfer before introducing the tool.
Estimated Time: 10 minutes.
13. Sponge Squeeze Race
Learning Objective: Build hand and forearm strength.
Materials: Small sponges, two bowls (one with water).
Steps: 1) Children soak the sponge in the water bowl. 2) Squeeze the sponge over the empty bowl to release the water. 3) Repeat until the water has transferred.
Teacher Tip: This is a wonderful outdoor or tray-based activity to avoid classroom spills.
Skills Developed: Hand strength, forearm strength, cause and effect.
Age: 3–5 years.
Difficulty: Easy.
Common Mistake to Avoid: Using sponges that are too large for small hands to fully compress.
Home Variation: Turn bath time into sponge-squeeze practice.
Advanced Variation: Measure how many squeezes it takes to fill a cup.
Extra Support Variation: Use a softer, smaller sponge that requires less grip strength.
Estimated Time: 10 minutes.
14. Recycled Bottle Cap Sort
Learning Objective: Build pincer grasp and fine visual discrimination.
Materials: Clean plastic bottle caps in various colors and sizes, a muffin tin.
Steps: 1) Mix bottle caps in a central bin. 2) Children pick up caps individually. 3) Sort into muffin tin cups by color or size. Teacher Tip: Wash and dry caps thoroughly and check for sharp edges before use.
Skills Developed: Pincer grasp, sorting, visual discrimination.
Age: 3–4 years.
Difficulty: Easy.
Common Mistake to Avoid: Skipping the safety check for cracked or sharp-edged caps.
Home Variation: Sort caps by size directly into egg carton cups.
Advanced Variation: Stack caps into towers by size for an added balance challenge.
Extra Support Variation: Reduce the sorting categories to just two.
Estimated Time: 10 minutes.
15. Clothespin Number Line
Learning Objective: Combine pincer grasp practice with number recognition.
Materials: Clothespins, a numbered strip or paper plate rim.
Steps: 1) Write numbers around a paper plate. 2) Give children a set of clothespins with dot patterns matching each number. 3) Children clip the correct clothespin to its numeral.
Teacher Tip: Rotate which numbers appear each week to keep the activity fresh.
Skills Developed: Pincer grasp, number recognition, one-to-one correspondence.
Age: 4–5 years.
Difficulty: Moderate.
Common Mistake to Avoid: Using too wide a number range for a child’s current level.
Home Variation: Practice with house numbers or a phone number strip.
Advanced Variation: Use two-digit numbers for advanced counters.
Extra Support Variation: Limit to numbers 1–5.
Estimated Time: 10 minutes.
16. Tweezer Ice Cube Rescue
Learning Objective: Build precision grasp and sustained attention.
Materials: Ice cube tray, small plastic toys frozen into ice, tweezers, warm water in a dropper.
Steps: 1) Freeze small toys into an ice cube tray ahead of time. 2) Children use a dropper to add warm water and tweezers to chip away ice. 3) “Rescue” the toy once free.
Teacher Tip: This is a fantastic sensory-and-fine-motor combo for a slower-paced center day.
Skills Developed: Precision grasp, hand strength, sustained focus.
Age: 4–5 years.
Difficulty: Moderate.
Common Mistake to Avoid: Freezing toys too deeply, which makes the task take far too long for a preschool attention span. Home Variation: Freeze small toys in a sandwich bag for bath time rescue play.
Advanced Variation: Add a stopwatch challenge for older children.
Extra Support Variation: Use smaller, shallower ice cubes that melt faster.
Estimated Time: 15–20 minutes.
17. Pom-Pom Drop Tube
Learning Objective: Build the pincer grasp and hand-eye coordination.
Materials: Cardboard tubes taped to a wall or easel, pom-poms.
Steps: 1) Children pick up a pom-pom with fingertips. 2) Drop it into the top of the tube. 3) Watch and catch it at the bottom. Teacher Tip: Tape several tubes at slightly different heights for variety.
Skills Developed: Pincer grasp, hand-eye coordination, cause and effect.
Age: 3 years.
Difficulty: Easy.
Common Mistake to Avoid: Using pom-poms too small, which can pose a choking hazard for younger threes.
Home Variation: Use a paper towel tube taped to the wall at home.
Advanced Variation: Add color-called-out sorting (“drop a red one first”).
Extra Support Variation: Use a wider tube opening for easier aim.
Estimated Time: 10 minutes.
18. Bead Sorting Muffin Tin
Learning Objective: Combine pincer grasp with categorization skills.
Materials: Assorted beads, a muffin tin, small spoon or tweezers.
Steps: 1) Mix beads in a central bowl. 2) Children use fingers, a spoon, or tweezers to sort beads by color into muffin cups. 3) Count each group when finished.
Teacher Tip: Offer three tool options (fingers, spoon, tweezers) so children can choose their challenge level.
Skills Developed: Pincer grasp, categorization, counting.
Age: 3–5 years.
Difficulty: Easy to moderate.
Common Mistake to Avoid: Not offering a supervision plan for very small beads with mouthing-stage children.
Home Variation: Sort dry cereal pieces by shape into an egg carton.
Advanced Variation: Sort by two attributes at once (color and size).
Extra Support Variation: Sort using fingers only, no tool required.
Estimated Time: 10–15 minutes.
19. Playdough Snake Roll and Cut
Learning Objective: Build hand strength and early scissor or cutting-tool skills.
Materials: Playdough, a plastic dough cutter or dull plastic knife.
Steps: 1) Children roll playdough between flat hands to form a long snake. 2) Use a dough cutter to slice the snake into sections. 3) Count the pieces created.
Teacher Tip: Demonstrate the flat, open-palm rolling motion first — many children want to squeeze into a ball instead.
Skills Developed: Hand strength, bilateral coordination, early cutting skills.
Age: 3–4 years.
Difficulty: Easy.
Common Mistake to Avoid: Handing over a sharp tool instead of a dull, child-safe dough cutter.
Home Variation: Roll and cut playdough “cookies” for pretend baking.
Advanced Variation: Cut the snake into equal-sized pieces using a ruler as a guide.
Extra Support Variation: Provide a pre-rolled snake so the child only practices cutting.
Estimated Time: 10 minutes.
20. Pipe Cleaner Pasta Threading
Learning Objective: Build bilateral coordination and finger isolation.
Materials: Pipe cleaners, dry rigatoni or penne pasta.
Steps: 1) Bend one end of the pipe cleaner into a small hook. 2) Children thread pasta pieces along the pipe cleaner. 3) Bend the top to secure once full.
Teacher Tip: Dye pasta ahead of time with rubbing alcohol and food coloring for an eye-catching center.
Skills Developed: Bilateral coordination, finger isolation, counting.
Age: 3–4 years.
Difficulty: Easy.
Common Mistake to Avoid: Using pasta shapes with holes too small for the pipe cleaner.
Home Variation: Make a pasta necklace as a keepsake craft.
Advanced Variation: Create a repeating pattern with two pasta shapes.
Extra Support Variation: Pre-hook a few pieces to build momentum.
Estimated Time: 10–15 minutes.
21. Button Sewing Cards
Learning Objective: Build hand-eye coordination and an early sewing motion.
Materials: Cardstock with pre-punched holes, yarn with a taped tip, large buttons for lacing.
Steps: 1) Give children a card with holes around its edge. 2) Thread yarn in and out of holes in sequence. 3) Add buttons along the way if desired.
Teacher Tip: Tape the yarn tip firmly with clear packing tape so it doesn’t fray mid-lesson.
Skills Developed: Hand-eye coordination, sequencing, grasp.
Age: 4–5 years.
Difficulty: Moderate.
Common Mistake to Avoid: Skipping the taped “needle” tip, which turns the activity into a frustrating tangle.
Home Variation: Sew a simple card border using a hole-punched paper plate.
Advanced Variation: Introduce a basic whip stitch around the card’s edge.
Extra Support Variation: Widen the holes and space them further apart.
Estimated Time: 15 minutes.
22. Popsicle Stick Tally Counting
Learning Objective: Build grasp and connect fine motor work to early math.
Materials: Popsicle sticks, small rubber bands, number cards.
Steps: 1) Show a number card. 2) Children count out that many popsicle sticks. 3) Bundle every group of five together with a rubber band.
Teacher Tip: Stretching the rubber band around the bundle is its own excellent grip-strengthening step.
Skills Developed: Grasp, hand strength, early math concepts.
Age: 4–5 years.
Difficulty: Moderate.
Common Mistake to Avoid: Choosing rubber bands too tight for small hands to stretch.
Home Variation: Practice counting spare craft sticks or coffee stirrers at home.
Advanced Variation: Introduce bundling by tens for kindergarten-level counting.
Extra Support Variation: Skip the rubber band step and simply count and group sticks.
Estimated Time: 10–15 minutes.
23. Paper Strip Weaving
Learning Objective: Build bilateral coordination and hand control.
Materials: A construction paper base with pre-cut slits, colorful paper strips.
Steps: 1) Give children a paper base with slits already cut. 2) Weave strips over and under through the slits. 3) Trim and glue the ends when finished.
Teacher Tip: Pre-cutting the slits saves classroom time and keeps the focus on the weaving motion itself.
Skills Developed: Bilateral coordination, hand control, pattern-following.
Age: 4–5 years.
Difficulty: Moderate.
Common Mistake to Avoid: Using strips that are too narrow, which are hard for beginners to grip and guide.
Home Variation: Weave a paper placemat together as a family project.
Advanced Variation: Alternate colors to create a checkerboard pattern.
Extra Support Variation: Use wider strips and a base with only three slits.
Estimated Time: 15–20 minutes.
24. Threading Straw Necklace
Learning Objective: Build hand-eye coordination and bilateral hand use.
Materials: Cut drinking straws, yarn or shoelace.
Steps: 1) Cut straws into 1-inch pieces ahead of time. 2) Children thread straw pieces onto the lace. 3) Tie off to complete the necklace.
Teacher Tip: Pre-cut colorful straws in advance so setup is truly no-fuss on center day.
Skills Developed: Hand-eye coordination, bilateral coordination.
Age: 3–4 years.
Difficulty: Easy.
Common Mistake to Avoid: Cutting straw pieces too short, making them difficult to grip and thread.
Home Variation: Use cut-up drinking straws left over from a party.
Advanced Variation: Alternate straw colors in a repeating pattern.
Extra Support Variation: Use a stiff pipe cleaner instead of floppy yarn.
Estimated Time: 10 minutes.
25. Pegboard Golf Tee Board
Learning Objective: Build pincer grasp and forearm control.
Materials: A foam board or thick styrofoam block, golf tees, a small mallet or block (optional).
Steps: 1) Give children golf tees and the foam board. 2) Press tees into the foam in a pattern, picture, or letter shape. 3) Remove and repeat.
Teacher Tip: Trace a simple outline (like a heart or star) onto the foam for children to fill in with tees.
Skills Developed: Pincer grasp, forearm control, pattern-following.
Age: 4–5 years.
Difficulty: Moderate.
Common Mistake to Avoid: Using a mallet with children who aren’t ready for that additional coordination step.
Home Variation: Press golf tees into a piece of thick cardboard.
Advanced Variation: Recreate their own name in tee “letters.”
Extra Support Variation: Use a softer foam that requires less pressing force.
Estimated Time: 10–15 minutes.
26. Sticker Peel-and-Stick Story
Learning Objective: Build pincer grasp through repeated peeling.
Materials: A blank storyboard page, an assortment of stickers.
Steps: 1) Give children a blank page and a sheet of stickers. 2) Peel and place stickers to build a simple story scene. 3) Dictate a sentence about their picture for the teacher to write down.
Teacher Tip: This doubles beautifully as an early literacy and storytelling activity.
Skills Developed: Pincer grasp, storytelling, creativity.
Age: 3–4 years.
Difficulty: Easy.
Common Mistake to Avoid: Overloading the page with too many stickers, which can overwhelm rather than support the storytelling goal.
Home Variation: Create a sticker scene about the family’s weekend.
Advanced Variation: Add a full written sentence beneath the picture.
Extra Support Variation: Offer only four or five stickers to choose from.
Estimated Time: 10 minutes.
27. Cotton Ball Pom-Pom Painting
Learning Objective: Build grasp and controlled hand movement.
Materials: Cotton balls or pom-poms, clothespins, paint, paper.
Steps: 1) Clip a cotton ball or pom-pom into a clothespin to make a simple “brush.” 2) Dip into paint. 3) Dab or drag across paper to create a design.
Teacher Tip: This is a wonderful, low-mess alternative to a traditional paintbrush for beginning painters.
Skills Developed: Grasp, controlled movement, creativity.
Age: 3 years.
Difficulty: Easy.
Common Mistake to Avoid: Skipping a paint tray, which leads to overloaded, drippy “brushes.”
Home Variation: Set this up on a covered kitchen table for rainy-day painting.
Advanced Variation: Ask children to create a specific pattern of dabs.
Extra Support Variation: Pre-clip the clothespin so the child only needs to dip and dab.
Estimated Time: 15 minutes.
28. Sponge Cutting Practice
Learning Objective: Build early scissor skills and hand strength.
Materials: Thin craft sponges cut into strips, child-safe scissors.
Steps: 1) Give children a sponge strip. 2) Practice opening and closing the scissors to snip small pieces off. 3) Collect the snipped pieces in a cup.
Teacher Tip: Sponge resists slightly more than paper, giving little hands helpful feedback as they learn to open and close scissors.
Skills Developed: Scissor skills, hand strength, bilateral coordination.
Age: 4–5 years.
Difficulty: Moderate.
Common Mistake to Avoid: Introducing paper-cutting before children can manage the open-close motion on a forgiving material like sponge.
Home Variation: Practice with an old kitchen sponge cut into strips.
Advanced Variation: Cut along a drawn line rather than free-snipping.
Extra Support Variation: Use spring-loaded, self-opening training scissors.
Estimated Time: 10 minutes.
29. Recycled Egg Carton Sorting
Learning Objective: Build pincer grasp and categorization skills.
Materials: A clean egg carton, small loose parts (buttons, pom-poms, beads).
Steps: 1) Label each egg cup with a color, number, or letter. 2) Children pick up loose parts one at a time. 3) Sort each into its matching cup.
Teacher Tip: Rotate the labeling system weekly (colors one week, letters the next) to keep the same materials fresh.
Skills Developed: Pincer grasp, categorization, one-to-one correspondence.
Age: 3–4 years.
Difficulty: Easy.
Common Mistake to Avoid: Using an egg carton with cracked or sharp edges.
Home Variation: Sort loose buttons from a sewing kit into a clean egg carton.
Advanced Variation: Add simple addition by asking how many total items are in two cups combined.
Extra Support Variation: Reduce sorting categories to just two or three cups.
Estimated Time: 10 minutes.
30. Clothespin Alphabet Match
Learning Objective: Combine pincer grasp practice with letter recognition.
Materials: Clothespins labeled with letters, a paper plate or ring with corresponding letters.
Steps: 1) Write letters around the edge of a paper plate. 2) Label a set of clothespins with matching letters. 3) Children clip each clothespin to its matching letter.
Teacher Tip: Start with just the letters in the child’s own name for a personalized, motivating twist.
Skills Developed: Pincer grasp, letter recognition, letter-sound connection.
Age: 4–5 years.
Difficulty: Moderate.
Common Mistake to Avoid: Introducing all 26 letters at once instead of starting with a meaningful, manageable subset.
Home Variation: Practice matching the letters in a child’s own name.
Advanced Variation: Ask the child to say the letter sound aloud before clipping.
Extra Support Variation: Limit the set to five familiar letters.
Estimated Time: 10–15 minutes.

Easy No-Prep Fine Motor Activities
Some days you need an activity that requires zero setup. These are my go-to, grab-and-go options for chaotic mornings or unexpected transition time.
- Finger Painting on a Tray — Squeeze a dab of paint (or pudding, for a taste-safe option) directly onto a tray and let children draw with just their fingertips.
- Air Writing — Have children “write” their name or shapes in the air using one finger, then switch to a whole arm.
- Sock Puppet Talk — An old sock over a hand turned into a puppet builds hand-opening and closing strength through pretend talking.
- Finger Tapping Rhymes — Tap each fingertip to the thumb in sequence while singing a familiar rhyme.
- Playdough-Free Squishing — Squeeze a stress ball, empty water bottle, or balled-up sock for pure hand-strengthening repetition.
- Pretend Piano Playing — Tap fingers on a tabletop as if playing piano, moving one finger at a time.
- Paper Ball Toss — Crumple scrap paper into a ball using only one hand, then toss it into a bin.
- Clothes Folding Practice — Fold small washcloths or doll clothes in half and quarters.
- Shadow Puppets — Use fingers to create simple shadow shapes on the wall using a flashlight.
- Finger Isolation Games — Practice showing just one finger at a time (thumbs up, pointer only, pinky wiggle) like a hand “workout.”
- Clapping Patterns — Copy a simple clap-and-tap pattern the teacher demonstrates.
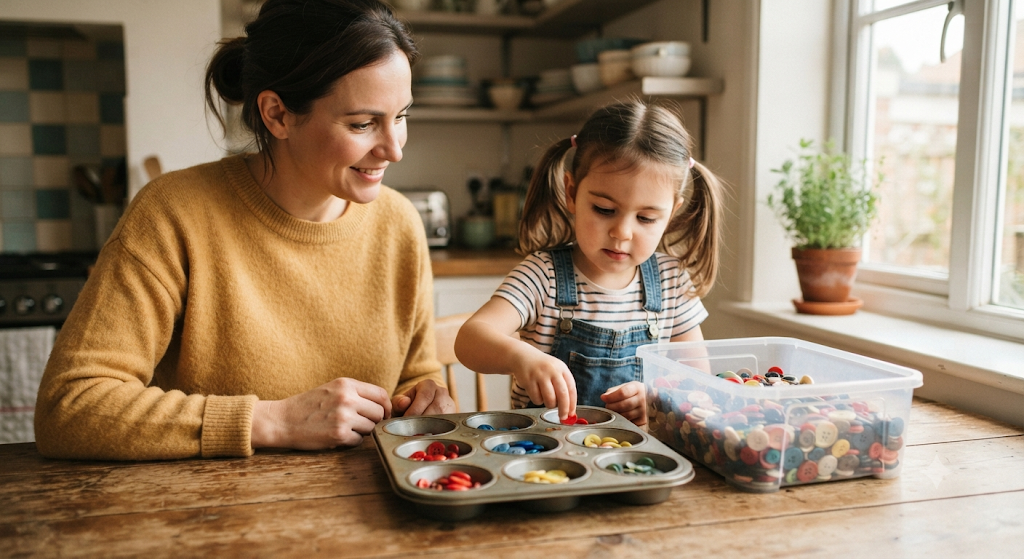
Fine Motor Activities Using Household Items
Homeschool parents and families don’t need a classroom supply closet to build strong hands. Everyday items already sitting in the kitchen drawer work beautifully.
- Dry Sponges and Water Bowls for squeezing practice at the sink.
- Kitchen Tongs and Cotton Balls for a tabletop transfer game.
- Dry Pasta and Yarn for a simple threading project.
- Old Muffin Tins for sorting buttons, coins, or dried beans by color or size.
- Clothespins from the Laundry Room for clipping onto a paper plate or cardboard box edge.
- Bubble Wrap Popping using just the thumb and forefinger for pincer strengthening.
- Rubber Bands on a Cardboard Box stretched over notches to build a “guitar” and strengthen finger extension.
- Empty Spice Jars with lids for twisting-and-opening practice.
- A Deck of Cards for shuffling, holding, and sorting practice.
- Rolling Socks Into Balls during laundry-folding time, a genuinely useful chore that doubles as hand-strengthening.
Fine Motor Activities That Improve Pencil Grip
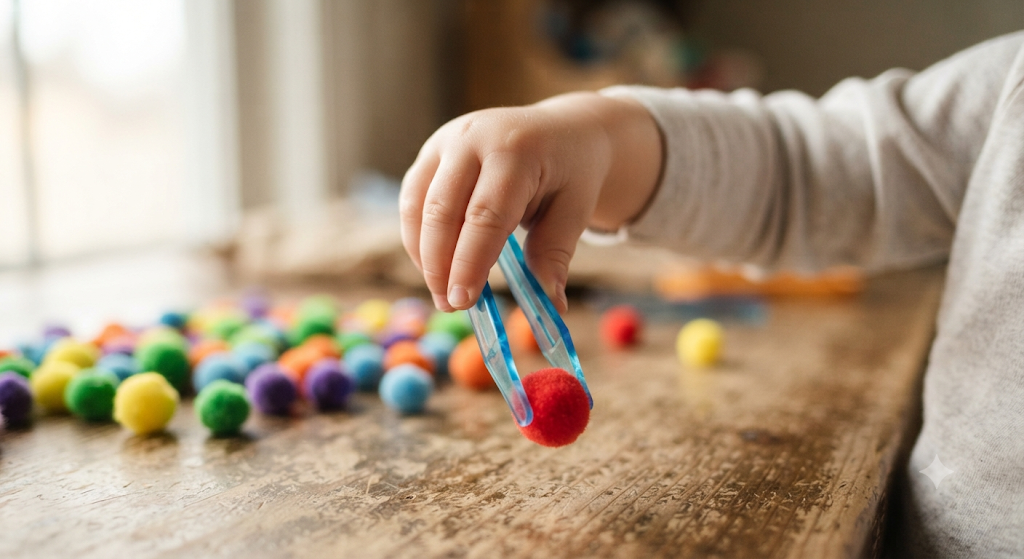
Pencil grip issues almost always trace back to weak intrinsic hand muscles the small muscles inside the palm and fingers, not the whole-arm muscles. That’s why grip problems rarely improve with more handwriting practice alone; they improve with more hand-strengthening play.
Activities that build the muscles used in a mature tripod grasp include tweezer work, clothespin clipping, playdough rolling and pinching, and threading beads. Each of these repeatedly isolates the thumb, index, and middle fingers exactly the three fingers used to hold a pencil correctly.
It’s also worth building in “resistance” activities, like squeezing a stress ball or stretching rubber bands over a box, since resistance work builds strength faster than open-handed play alone. I always tell new teachers: don’t hand a struggling writer more worksheets. Hand them tweezers and playdough first, and the pencil control tends to follow within a few weeks.
Common Mistakes Teachers Make
Even experienced teachers fall into a few predictable traps with fine motor instruction. Here’s what to watch for.
Mistake: Treating fine motor time as “filler” rather than core curriculum. Solution: Schedule fine motor centers with the same intentionality as literacy or math blocks.
Mistake: Offering the same activities all year. Solution: Rotate materials every one to two weeks to maintain engagement and progressively increase challenge.
Mistake: Rushing children through open-ended play. Solution: Allow at least 15–20 minutes of uninterrupted time so children can build skill through repetition.
Mistake: Skipping the “just right” challenge level. Solution: Offer at least two difficulty tiers within every center so no child is bored or overwhelmed.
Mistake: Correcting pencil grip directly instead of building the underlying hand strength. Solution: Address grip indirectly, through hand-strengthening play, rather than repeatedly repositioning fingers on a pencil.
Mistake: Not involving families. Solution: Send home a simple list of household fine motor ideas so practice continues outside the classroom.
How to Assess Fine Motor Development
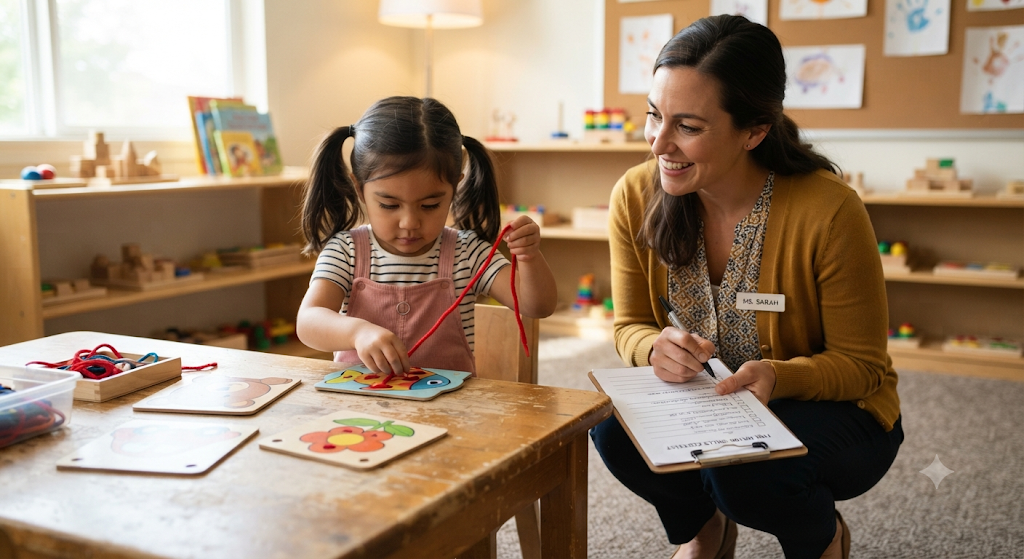
You don’t need a formal occupational therapy evaluation to track meaningful progress. A simple, ongoing observation checklist is often the most useful tool a classroom teacher has.
Fine Motor Skills Observation Checklist for Preschool Teachers
| Skill Observed | Emerging | Developing | Mastered |
| Uses a pincer grasp (thumb and forefinger) | |||
| Strings large beads independently | |||
| Snips paper with scissors | |||
| Cuts along a straight line | |||
| Holds a crayon with a tripod-like grasp | |||
| Rolls and pinches playdough | |||
| Buttons or zips clothing with minimal help | |||
| Copies simple shapes (circle, cross, square) | |||
| Completes a simple puzzle (4–12 pieces) | |||
| Uses two hands together for a task (bilateral coordination) |
Use this checklist quarterly to track growth over the school year, and share it with families during conferences so everyone stays on the same page about a child’s progress. If a child shows consistent, significant delays across multiple categories by age four, it’s worth a gentle conversation with the family about a developmental screening or an occupational therapy consultation early support makes a real difference, and organizations like the cdc.gov/child-development/ offer free developmental milestone checklists that pair well with classroom observation.
Frequently Asked Questions
What are fine motor skills?
Fine motor skills are the small, precise movements of the hands and fingers used for tasks like writing, cutting, buttoning, and picking up small objects.
How can I improve fine motor skills in preschoolers?
Offer daily, hands-on practice with tools like tweezers, clothespins, playdough, and threading materials, and allow plenty of open-ended play time to build strength and coordination naturally.
How often should preschoolers do fine motor activities?
Aim for at least 15–20 minutes of dedicated fine motor practice every day, in addition to the incidental fine motor work built into art, snack, and dressing routines. https://meblogger.com/school-readiness-activities-for-kids/
Which activities improve pencil grip specifically?
Tweezer work, clothespin clipping, playdough rolling, and bead threading all target the same three fingers used in a mature pencil grasp.
What are the best fine motor activities for 3-year-olds?
Simple, large-motor-adjacent tasks work best at this age, including pom-pom drop tubes, clothespin clipping, and cotton ball painting.
What are the best fine motor activities for 4-year-olds?
Four-year-olds are ready for more sequencing and precision, such as lacing cards, pegboard patterns, and playdough letter formation.
What fine motor skills should a kindergartner have?
By kindergarten, most children can hold a pencil in a near-mature grasp, cut along a curved line, and complete simple lacing or threading tasks independently.
Are fine motor activities the same as sensory play?
They overlap but aren’t identical sensory play engages the senses broadly, while fine motor activities specifically target hand and finger control, though many activities (like playdough) do both at once.
Do fine motor activities help with school readiness overall?
Yes strong fine motor skills support independence in self-care, confidence in writing tasks, and stamina for the hands-on demands of a kindergarten classroom.
What should I do if a child seems behind in fine motor development?
Increase daily hands-on practice, track progress with a simple observation checklist, and consult with families about a developmental screening if delays persist across multiple skills.
Conclusion
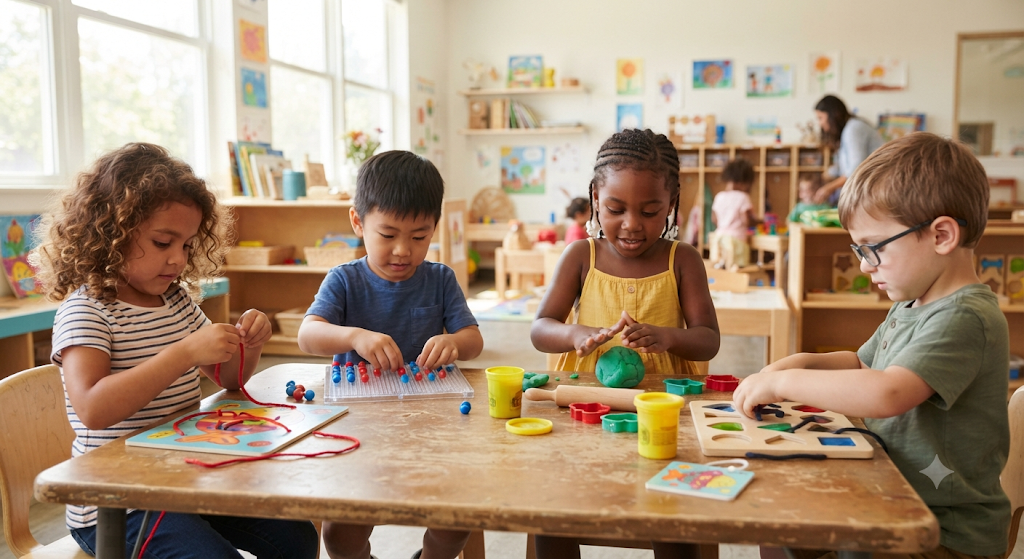
Fine motor development doesn’t need to be complicated, expensive, or time-consuming it just needs to be consistent. The easy fine motor activities for preschool classroom routines in this guide are designed to fit naturally into the day you’re already running, using materials you likely already have in a supply closet or junk drawer.
My best advice after fifteen years in the classroom: pick one activity from this list and commit to it every single day, even if it’s only for ten minutes. Small, daily repetition builds real, lasting hand strength far more effectively than occasional, elaborate projects.
If you found this guide helpful, bookmark it for easy reference during your weekly lesson planning, and share it with a fellow teacher who could use a fresh batch of ideas. You might also enjoy exploring related resources on School Readiness Activities, Letter Recognition Activities, Pencil Grip Activities, Pre-Writing Activities, Name Writing Activities, Scissor Skills Activities, and Preschool Worksheets to round out a full early learning program.
Fine Motor Skills Observation Checklist for Preschool Teachers
Child’s Name: ______________________ Age: _______ Date: _______
Use this checklist quarterly to track a child’s fine motor progress. Mark each skill as Emerging (just starting to attempt), Developing (attempts with some success), or Mastered (consistently independent).
| Skill Observed | Emerging | Developing | Mastered | Notes |
| Uses a pincer grasp (thumb and forefinger) | ☐ | ☐ | ☐ | |
| Strings large beads independently | ☐ | ☐ | ☐ | |
| Snips paper with scissors | ☐ | ☐ | ☐ | |
| Cuts along a straight line | ☐ | ☐ | ☐ | |
| Cuts along a curved line | ☐ | ☐ | ☐ | |
| Holds a crayon/pencil with a tripod-like grasp | ☐ | ☐ | ☐ | |
| Rolls and pinches playdough | ☐ | ☐ | ☐ | |
| Buttons or zips clothing with minimal help | ☐ | ☐ | ☐ | |
| Copies simple shapes (circle, cross, square) | ☐ | ☐ | ☐ | |
| Completes a simple puzzle (4–12 pieces) | ☐ | ☐ | ☐ | |
| Uses two hands together for a task (bilateral coordination) | ☐ | ☐ | ☐ | |
| Turns pages of a book one at a time | ☐ | ☐ | ☐ | |
| Uses a spoon or fork independently at snack/mealtime | ☐ | ☐ | ☐ | |
| Screws/unscrews a lid or cap | ☐ | ☐ | ☐ | |
| Ties or attempts to tie a simple knot or bow | ☐ | ☐ | ☐ |
Overall Notes / Next Steps:
Recommended Follow-Up (if applicable): ☐ Continue current practice ☐ Increase daily fine motor time ☐ Discuss with family ☐ Consider developmental screening
Part of the “Easy Fine Motor Activities for Preschool Classroom” guide.